


1. N8Requirements:
2. C6-01
3. C7
a. Python Set S60V3
b. CE Proxy+
c. Stock Opera Mini
d. OMCHEESEPATCH
e. FreeSigner (for unhacked phones)
f. Patience and lots of it.
Lets begin!
1. Access Point Settings
1.1. Press MENU KEY, Settings > Connectivity > Settings > Destinations > Internet > Options > New Access Point, if asked "Automatically check for available access points?" click "No". Select "Packet Data". "Packet Data Access Point Name:" internet (for SMART). Press "Ok".2. Installations
1.2. Long press on the connection made then choose “Change Priority” and make it the 1st priority.
1.3. Edit your connection. You may or may not change the connection name; it’s up to you as long as your access point name is "internet" (for SMART without the quotation marks).
1.4. Click Options > Advanced Settings. Change “Proxy Server Address” to 127.0.0.1 and “Proxy Port Number” to 1234 and you're done!
For unhacked units, you need FreeSigner to sign your applications. For S^3 devices, you can download this free at http://www.n8fanclub.com. You can get your cert and key at http://www.shoujizu.net/en/, needs registration. If your phone is already hacked, go to 2.3. FreeSigner is available for download including all other applications at the bottom of the post.
2.1. How to obtain and use your cert & key for unhacked phones:
2.1.1. Go to http://www.shoujizu.net/en/ (formerly known as cer.opda.cn)
2.1.2. Register and provide the following:
2.1.2.1. User name
2.1.2.2. Password
2.1.2.3. Confirm Password
2.1.2.4. Email address
2.1.2.5. Verification code
2.1.3. After filling up the registration form, click “complete”, you will be re-directed to the main page, click login to continue.
2.1.4. You will now be in the Certificate page, click Apply Certificate. Provide the following:
2.1.4.1. Phone model
2.1.4.2. IMEI (to get your IMEI, on your mobile phone, type *#06*)
2.1.4.3. Confirm IMEI
2.1.4.4. Remark
2.1.5. Click “Submit and Upload”. This may take some time or others say it took them 2-3 days or even weeks to generate, so be patient.
2.1.6. When your cert and key is generated, you can now sign your applications or games online or you can download your cert and key so you can use it to sign your applications via FreeSigner.
2.2. How to use your cert & key on FreeSigner:
2.2.1. Download your cert file. Once downloaded, rename it and change the file extension to .cer. (i.e. mycert.cer)
2.2.2. Download your key file. Once downloaded, rename it and change the file extension to .key. (i.e. mykey.key)
2.2.3. To make it easier to locate, create a folder and place both files inside. You can now transfer it to your memory card, mass memory or phone memory.
2.2.4. Open FreeSigner. (If you still haven’t installed it on your phone, make sure that it is already signed under your own cert and key. You can do this online. Upload your copy of FreeSigner and it will be automatically signed online under your cert and key. Download your signed copy then install.)
2.2.5. Press Options > Settings.
2.2.6. Press Sign Cert then locate your .cer file.
2.2.7. Press Sign Key then locate your .key file.
2.2.8. Once done, you can now sign your applications and games on your mobile phone. Just click “Add Task”, locate the application or game you want to sign, click Options > Go!, wait for the application to be signed and your done! You will have two copies of your file, one is unsigned, and the other one is the signed app/game. Both will be located on the drive where you placed it.
2.3. Installing the Components
2.3.1. For unhacked phones, sign first numbers 2.3.1.1-1.6 & 2.3.1.8. Install in chronological order on your phone memory or C:/ drive except for 2.3.1.7 which can be installed on your mass memory or E:/ drive.
2.3.1.1. Python 1.4.5
2.3.1.2. Python Script Shell 1.4.5
2.3.1.3. Python 2.0.0
2.3.1.4. Python Script Shell 2.0.0
2.3.1.5. Python Extra Power module Pack V3.80
2.3.1.6. CEPplusS60V5_reconfg_by_payas0
2.3.1.7. Stock_OM6_S60V3
2.3.1.8. OMCHEESEPATCHS60V3
2.4. CE Proxy+ Settings
2.4.1. Run CE Proxy+.
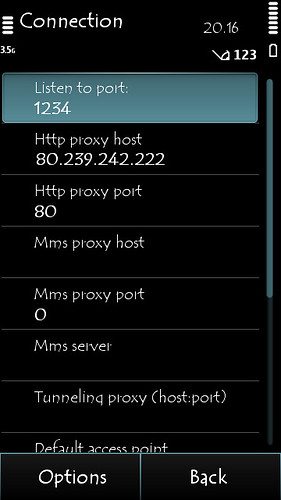
2.4.2. Press Options > Settings > Connections. Change the following:
2.4.2.1. Listen to Port: 1234
2.4.2.2. HTTP Proxy Host: 80.239.242.113 or 80.239.242.112 or 80.239.242.222 or any other global IP.
2.4.2.3. HTTP Proxy Port: 80
2.4.2.4. Default Access Point: choose the access point that you created earlier.
2.4.2.5. Save.
2.4.3. Press Options > Settings > Tweaks. Change the Following:
2.4.3.1. URL Prefix: /
2.4.3.2. Save.
3. Final Step!2.4.4. Exit CE Proxy+ then re-run. Let it run in the background, DO NOT EXIT CE PROXY AFTER RE-RUNNING.
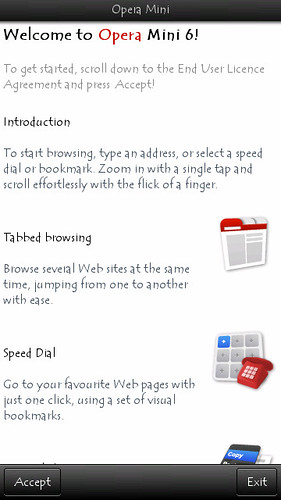
3.1. Run Opera Mini 6 and enjoy!
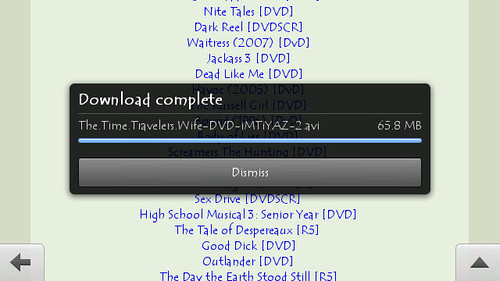
SCREENSHOTS:


0 comments:
Post a Comment